Opening the console
Your manager will share a Staff Console link with you. Open that link on any device — a desk computer, a tablet, or your phone — and you're ready to go. There's nothing to install.
Keep the link private. Anyone who has this link can run your queue. Treat it like a key: don't post it publicly or share it outside your team.
The console updates itself automatically. When something changes — a new person checks in, a coworker calls someone — you'll see it appear within a few seconds. You'll notice a small "Live" label letting you know everything's connected.
The console at a glance
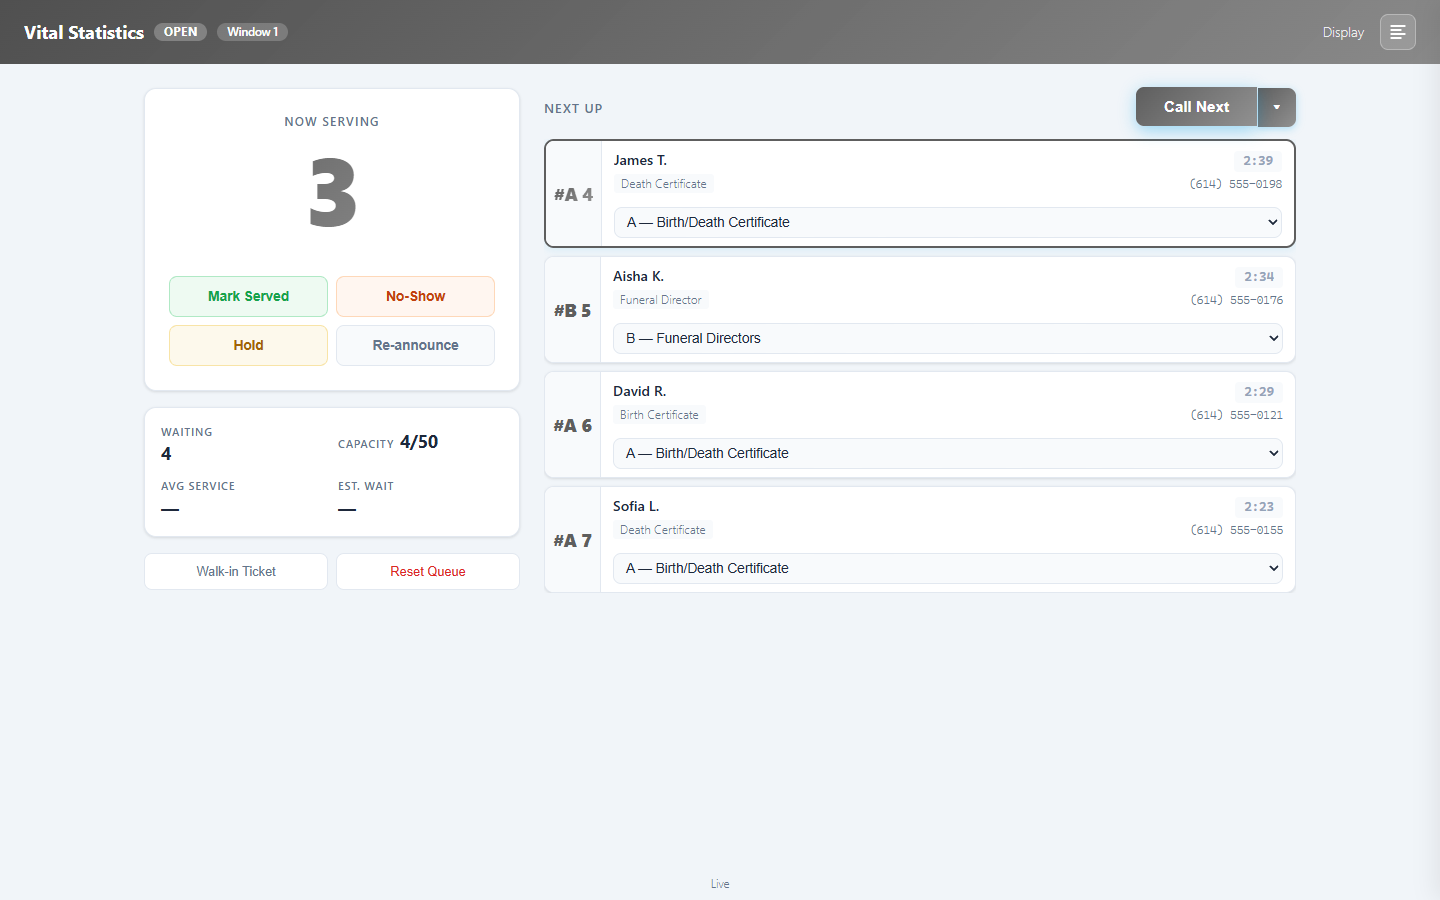
The screen is split into a few simple areas:
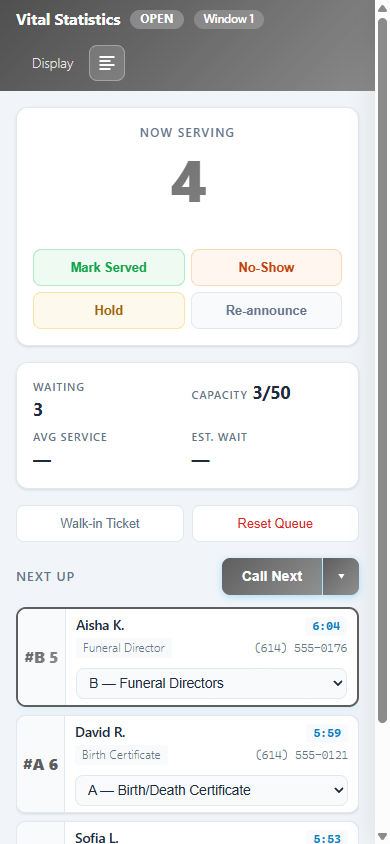
- Now Serving — the big number in the middle-left. This is the person you're currently helping, along with their name and reason for visiting (if they gave one).
- Next Up — the list on the right. These are the people waiting, in order, with a live timer showing how long each has waited.
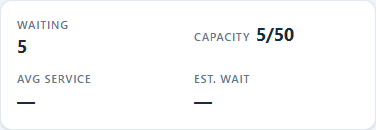
- Waiting / stats — small tiles showing how many people are waiting, the average time you spend per customer, and the estimated wait.
- Action buttons — under the Now Serving number: Mark Served, No-Show, Hold, and Re-announce. Above the Next Up list: the Call Next button.
- Top bar — the queue name, an Open / Closed badge, a Display link (the lobby TV), and a Recent Tickets menu (the list icon).
- Now Serving — who you are helping now
- Next Up — the waiting list, in order
- Waiting / stats — counts, capacity & wait times
- Action buttons — Mark Served, No-Show, Hold, Re-announce
- Call Next — brings up the next person
- Top bar — queue name, Open/Closed, Display, Recent Tickets
Call the next person
- Look at the Next Up list to see who's waiting.
- Press the big Call Next button.
- The next person's number jumps up to Now Serving, and they're announced.
That's it. Help them, then mark how it went (see below).
Calling by reason (if your queue uses it)
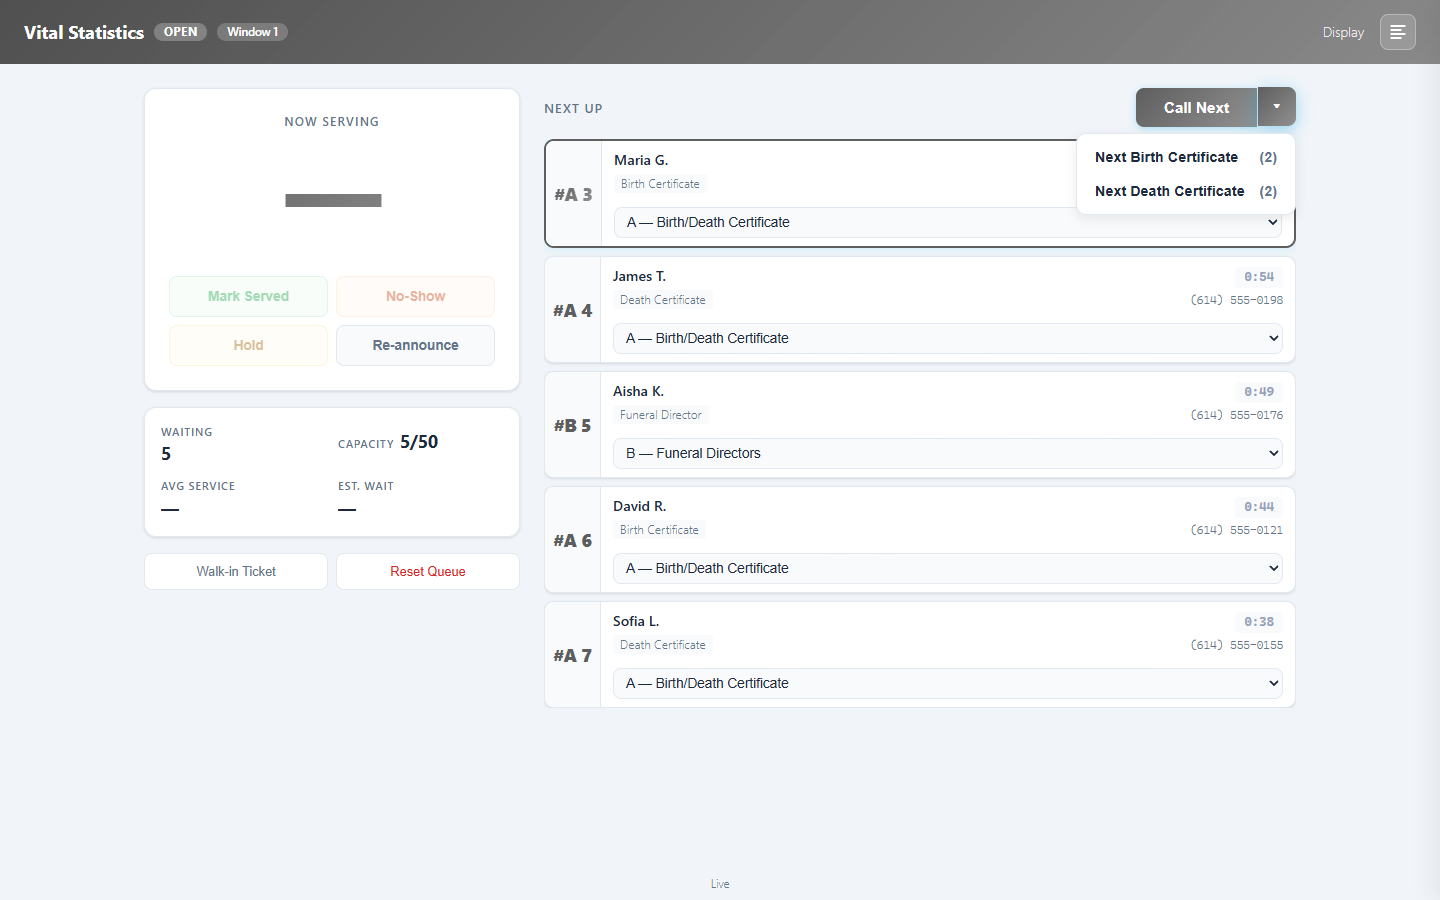
If your queue sorts people by why they're visiting (for example "Pickup" vs. "Questions"), you'll see a small arrow (▾) next to Call Next.
- Press the arrow to open a short menu.
- Pick the reason you want — for example "Next Pickup."
- TinyQ calls the next person waiting for that reason. The number in the menu tells you how many are waiting for each one.
Press the main Call Next button any time you just want the next person overall.
Finish with a customer
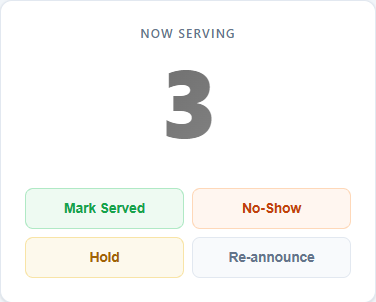
Once you've helped the person in Now Serving, tell TinyQ how it went using the buttons under their number:
- Mark Served — you helped them and you're done. A quick "✓ Ticket Served" note appears, then the spot clears so you can call the next person.
- No-Show — they didn't come up when called. This clears them out so the line keeps moving.
- Hold — you need to set them aside for a moment (they stepped away, or you're waiting on something). They're moved off Now Serving so you can Call Next and keep going. You can bring them back later — see Bring someone back below.
- Re-announce — repeat the announcement for the person you're serving now, in case they didn't hear it the first time. Nothing changes; it just calls their number again.
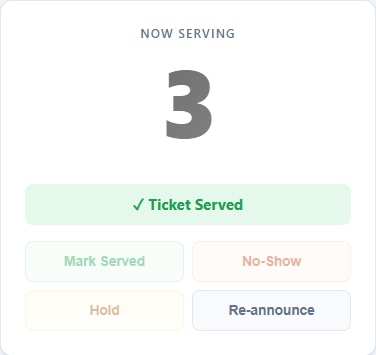
Good to know: the confirmation stays on screen for a few seconds so everyone (including the lobby TV) sees who was just finished, then it clears on its own.
Bring someone back (Recall)
Called someone by mistake, or need to re-help someone you already finished? Use the Recent Tickets panel.
- Press the list icon in the top-right corner to open Recent Tickets.
- Find the person in the list.
- Press Recall to bring them back into Now Serving.
You can also change how a past ticket was marked here — switch someone between Served, No-Show, and Skipped if you tapped the wrong button.
Open Recent Tickets from the list icon in the top-right corner of the console. It slides out with your recently served, no-show, and skipped tickets — each with a Recall button.
Add a walk-in
Someone walked up without checking in on their phone? Add them yourself.
- Press Walk-in Ticket (lower-left, under the stats).
- If your queue collects customer info, a short form pops up asking for the same details customers normally give — things like name, phone, email, and reason for visit. Fill in what you have.
- Press Create Ticket.
The walk-in joins the line just like everyone else.
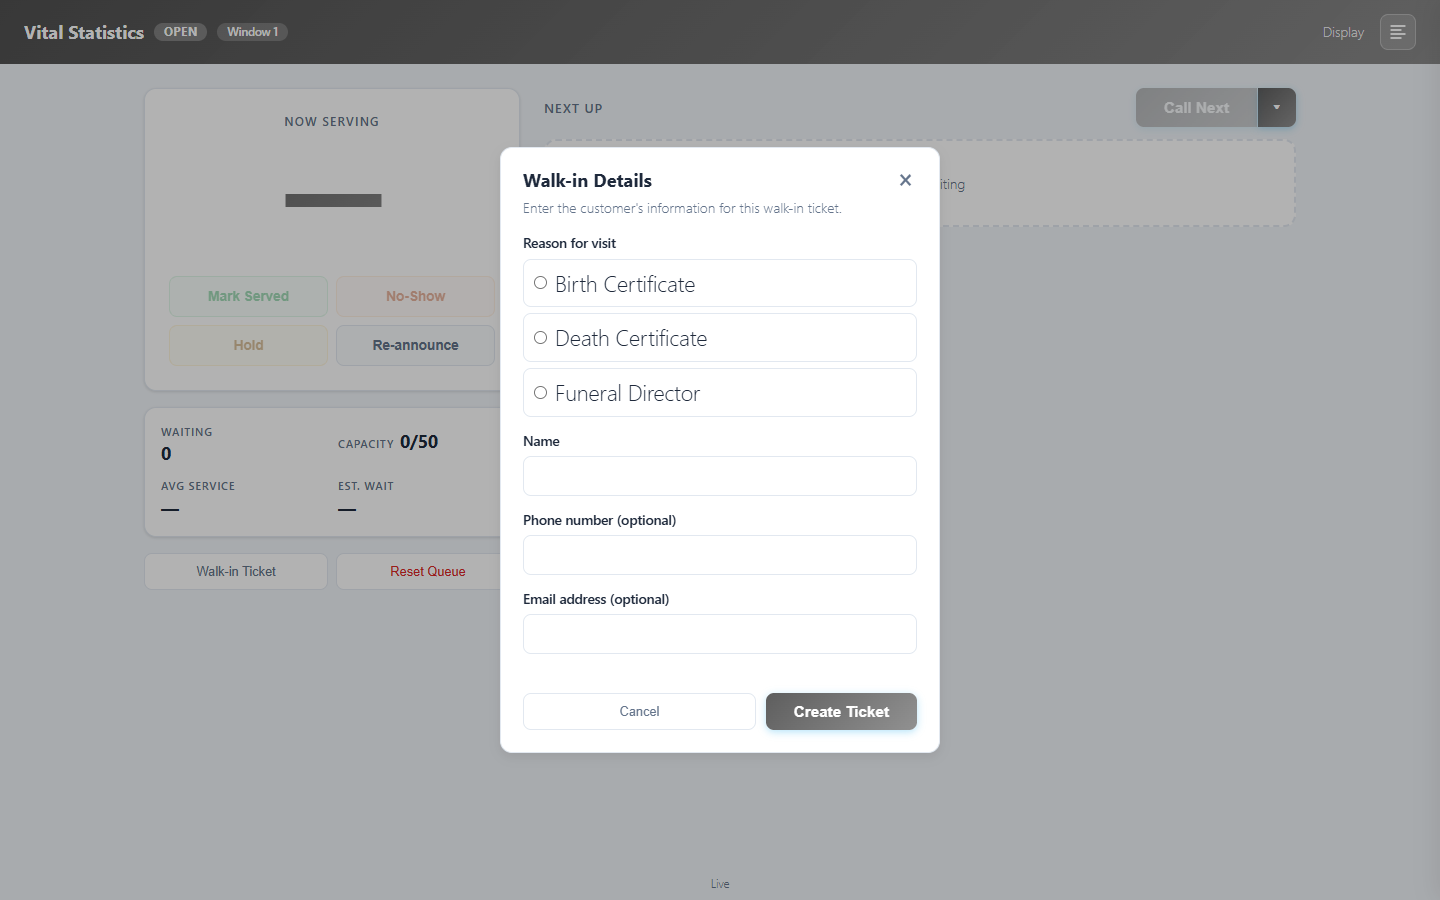
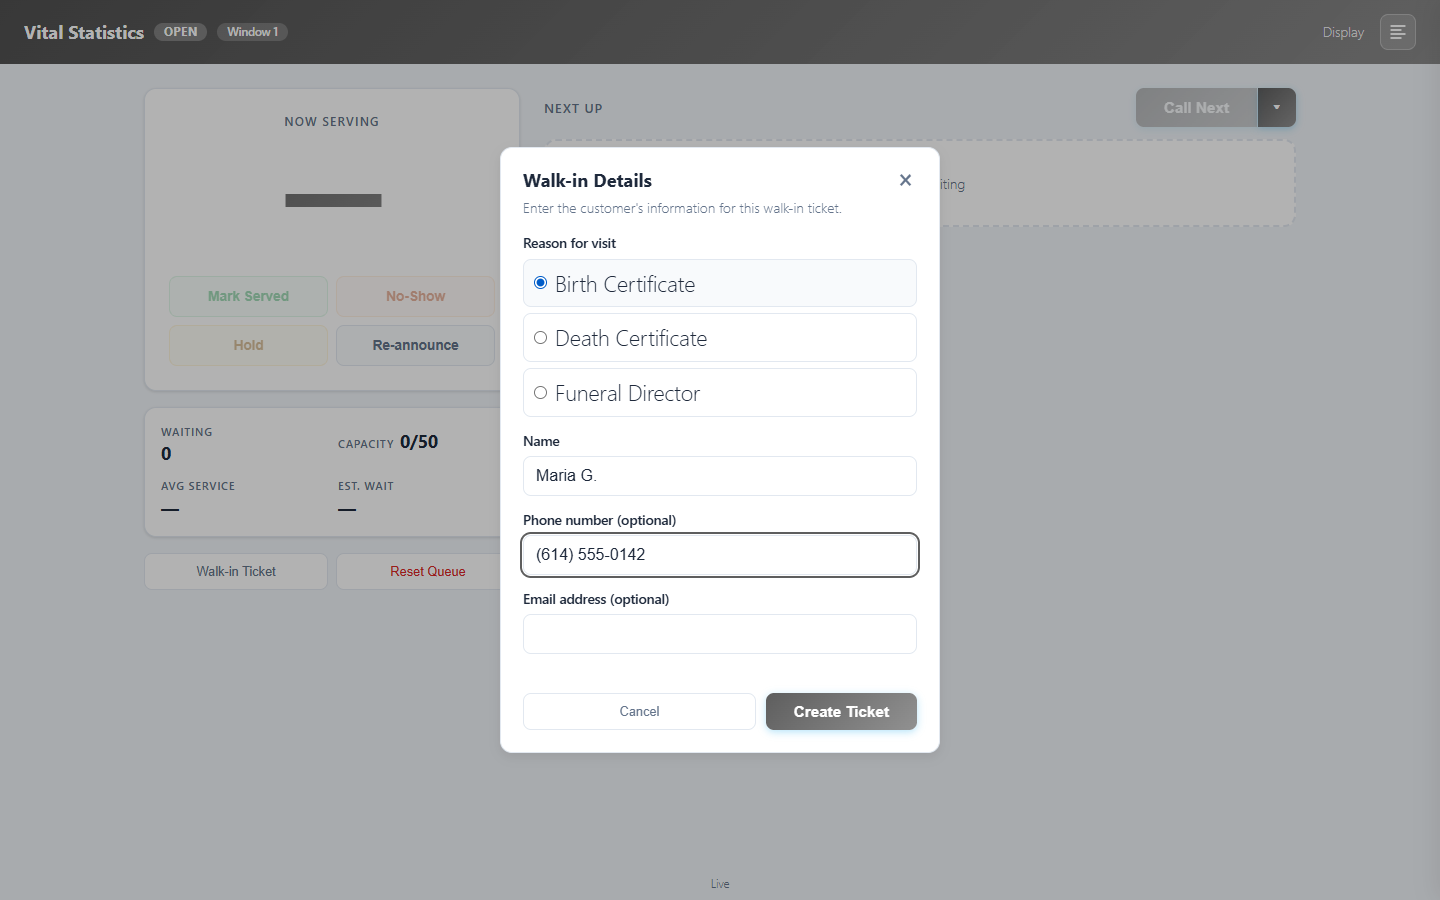
Quick walk-ins: if your queue doesn't collect any customer details, pressing Walk-in Ticket simply adds an anonymous ticket right away — no form, no waiting.
Move someone to another line or window
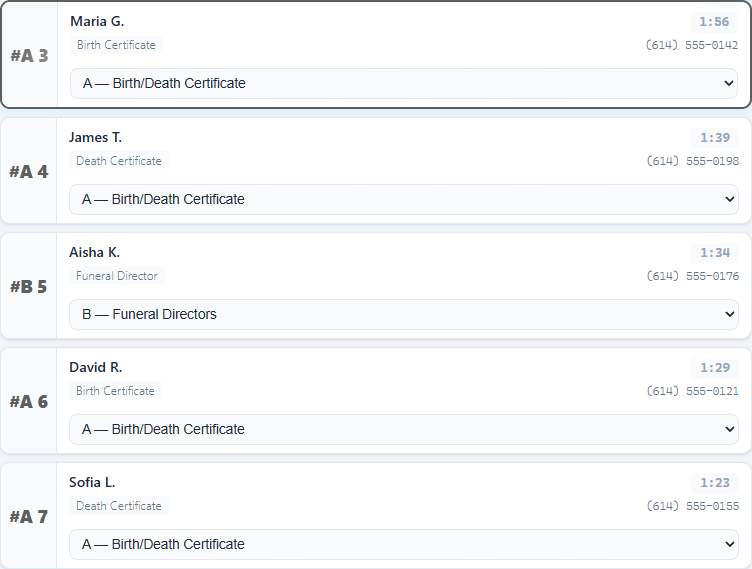
If your queue has more than one service line (for example Line A and Line B), you can move a waiting person from one to another.
- Find the person in the Next Up list.
- Use the "Move to line…" dropdown on their card (in some layouts it's under a ⋯ more menu).
- Pick the line you want to move them to.
They hop over to the other line's queue, keeping their place fairly.

Pick your window (multi-window queues)
If your location has several windows or stations, the console asks which one you are when you open it.
- On the Select Your Window screen, tap your window (for example Window B).
- The console remembers your choice, and your window shows as a badge at the top.
From then on, Call Next pulls the right person for your window. You only have to pick once per session.
You'll see the Select Your Window screen only on multi-window queues, and only once per session — after that, your window appears as a badge in the top bar (for example Window A).
Keep an eye on capacity
Some queues have a limit on how many people can wait at once. When one is set, you'll see a Capacity tile (for example 8/10). It turns yellow as it fills and red when it's nearly full.
If the queue reaches its limit, a "Queue Full" banner appears and new customers can't check in until someone is served. You can still add a walk-in yourself if you need to.
Show it on a TV
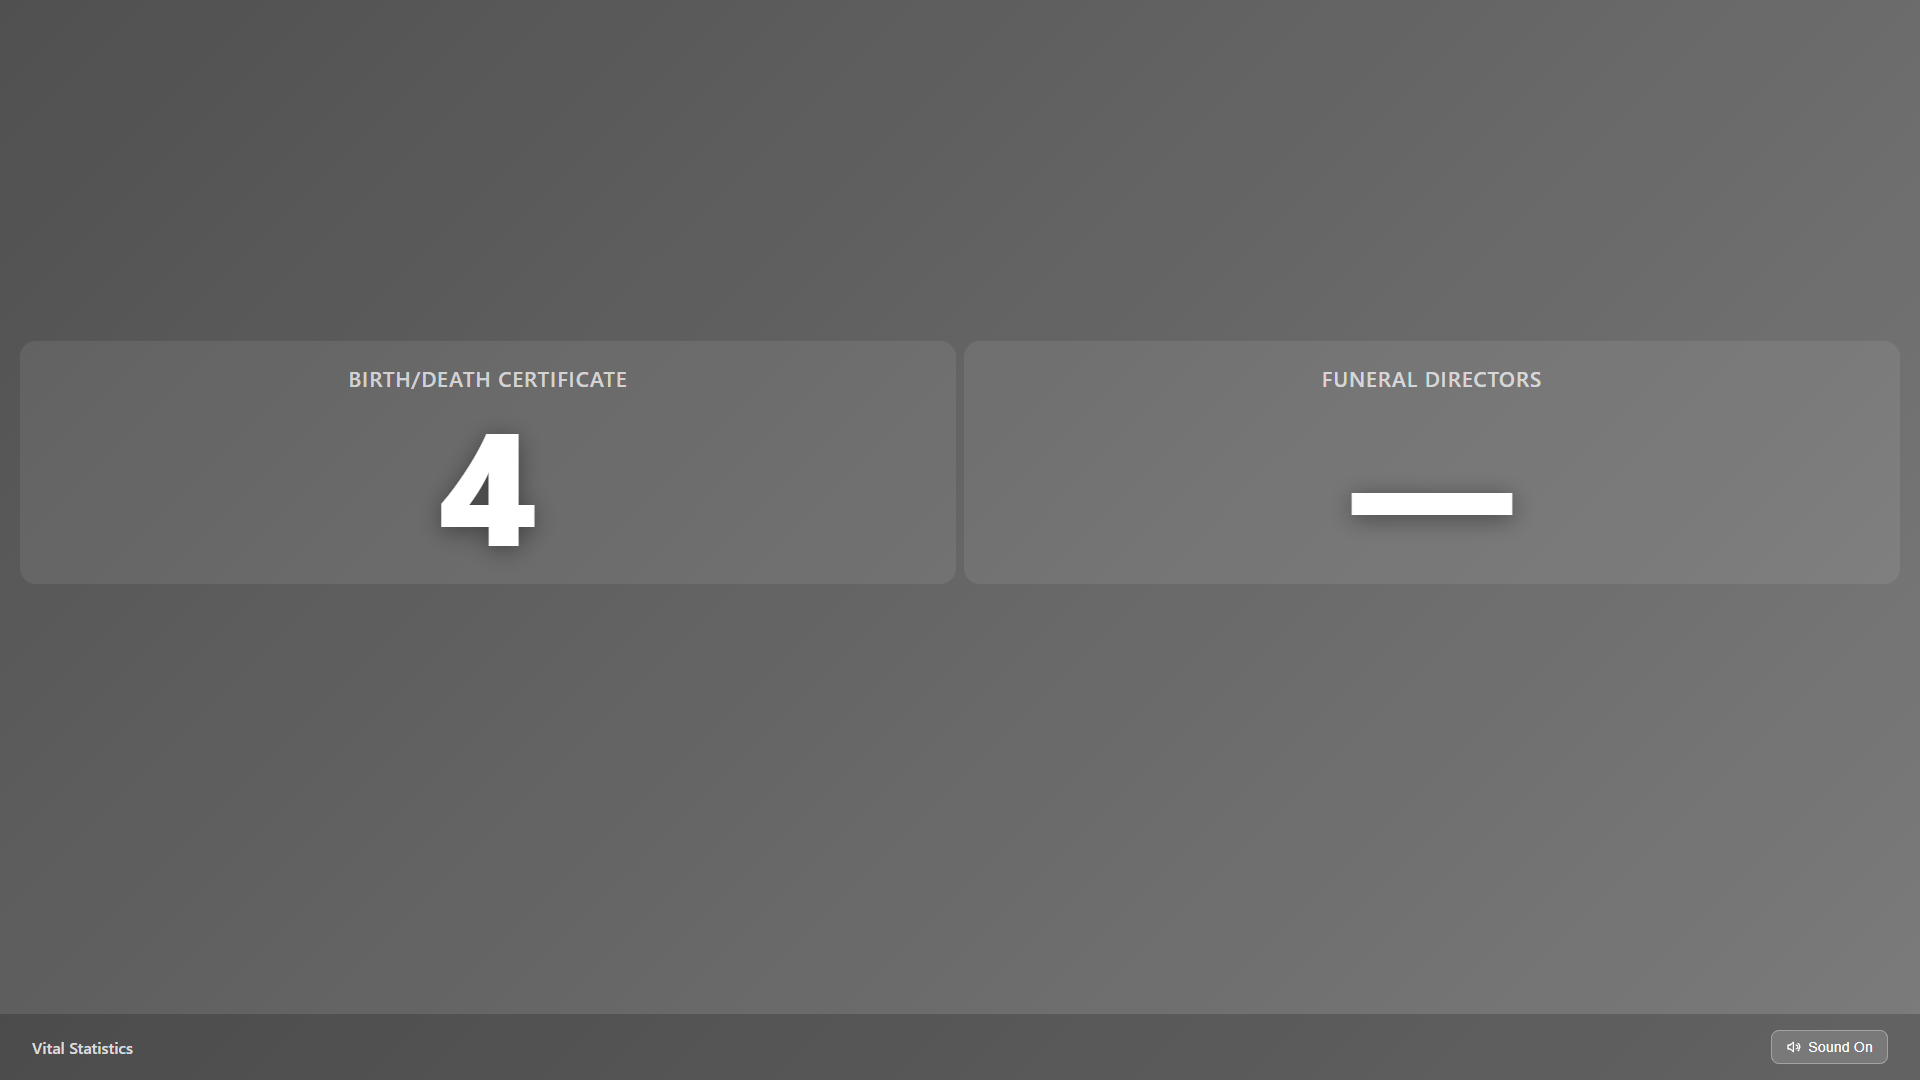
The Display is the big "Now Serving" board for your lobby or waiting area, so customers can watch for their number.
- Press the Display link in the top bar. It opens in a new tab.
- Move that tab to your TV or second screen and make it fullscreen (the display offers a Start button to go fullscreen and keep the screen awake).
- To turn on spoken announcements, tap the Sound button on the display once. It starts as "Sound Off" — one tap enables the voice (browsers require a tap before they'll play audio).
Where do customers check in? Customers scan your queue's QR code (printed from your queue's dashboard and posted at your entrance or counter) or open your check-in link. That puts them in the Next Up list automatically — no work needed on the console.
Clear the queue at end of day
When you're closing up, Reset Queue wipes the slate clean.
- Press Reset Queue (lower-left, next to Walk-in — shown only if you have permission).
- Confirm when asked.
- Now Serving clears and the entire Next Up waiting list is emptied.

Use with care. Reset removes everyone currently waiting — it can't be undone. Only reset when you truly want to start fresh, like at the end of the day. It won't erase your past records, just the people in line right now.
Tips & good to know
- It's always live. You don't need to refresh. If two coworkers have the console open, calling someone on one updates the other within seconds.
- Works on any screen. Desk computer, tablet, or phone — same buttons, same flow.
- Wait timers help you prioritize. Each person in Next Up shows how long they've waited; long waits are highlighted so nobody gets forgotten.
- Tap the wrong button? No panic — open Recent Tickets to recall someone or fix how a ticket was marked.
- Keep the console link private — anyone with it can run your queue.
- Open / Closed badge at the top tells you whether customers can currently check in. If you have permission, you can flip it right from the top bar.
That's everything. Call, finish, repeat — TinyQ handles the rest.
Sign in to your console